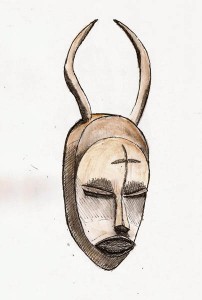
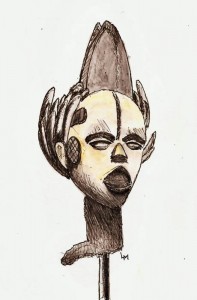
I slogged my way through rain, this morning to meet Claudette at the Musee de la Civilisation. Only upon arrival both of us realized that it wasn’t supposed to be open – the museum is normally closed on Mondays. But, because of the long weekend they decided to be open so we got lucky.
We sketched and talked and talked and sketched some more. Don’t ya just love sketching with someone who goes into a trance while sketching but also needs a chit-chat break every hour or so? I sure do as my old-man back needs to stretch once in a while.
As I’ve had a couple people ask me how I sketched these shapes with a pen and not have a lot of restated lines, I thought I’d show you a couple of the intermediate steps.
Unfortunately, I didn’t think about this until after the first step was done – the pencil step. I admit it; I use a pencil. It’s fashionable to shun a pencil as an indicator of greatness but in my opinion that’s nuts. Why? Well, if nothing else, if it was good enough for many of the greats, who used pencil to lay out their drawings/paintings, then it’s good enough for me. But also, without some ‘scaffolding’ you’re shooting in the dark to get the size/location relationships between the parts and you start working ‘additively’, drawing a piece and then adding things to it to get the whole. It’s far better to work ‘divisively’, dividing your paper space after defining the whole, repeatedly dividing until you have the smallest details you want to add.
What do I mean by scaffolding? Well, the first thing I do is lightly draw a rectangle that will hold the entire object/scene. I also mark the center point of that rectangle and note where the cener is on the actual object. I use the ‘hold up your pencil’ trick to measure this stuff.
Then I note where the object touches that rectangle as I lightly draw blobs and lines to represent the basic component parts. As I do this I compare this scaffolding to the object itself, correcting as I go. Once you’ve got this stuff on paper, all that’s left is to sketch, very lightly, the actual object parts inside their corresponding blobs.
With some practice, you can do the sketch without an eraser so doing it with pen is no problem. I do this light as I can, though, with lots of broken and/or thin lines. This allows some small changes if necessary. The result looks like Fig 1, which was done ina Stillman & Birn Epsilon (5.5×8.5) sketchbook with a Pilot Prera (F) with Noodler’s Lexington Gray.
Then I start darkening the lines, emphasizing some by varying the line thickness. I also start adding some shading and how much depends upon how much I want to depend upon ink and how much on color to generate shading. The results looks like Fig 2. I used the Prera for most of it but occasionally used a Lamy Safari (EF) when I wanted a thicker line.
Then I’ll some color, or at least some grays. In this case I used a black and a couple brown watercolor pencils (Faber-Castell) and a waterbrush to finish up with this sketch (Fig 3).
 With some time left I decided to do this mask. I’m not sure what the tall horns are all about as they say it’s worn during marriage celebrations. Maybe Nigerians know more about marriage than we do (grin)


