Pilot Oil-Based Drawing Pens

This is a just a quick note about the “new” (recently available on Jet Pens) Pilot oil-based drawing pens.  I bought the 01 and 03 versions of this pen as I was intrigued by the ‘oil-based’ approach.

PilotDrawingPen

I think it’s fair to say that the de facto standard in the nylon/felt drawing pen world is the Sakura Pigma Micron pen line and I’ll use them as a baseline because so many know these pens.

I must preface my comments with the realisation that most people don’t pay much attention to the actual sizes of tips of these pens and realize that a Micron 05 makes a thicker line than a Micron 03 but the actual thickness is not precisely indicated by those numbers.

So be it, but we also have expectations when it comes to this sort of labelling and expect that a Staedtler 03 won’t be too different from the Micron 03 in width.  That is the reason for this note.

PilotOil-BasedPensThis is displayed larger than life so that the line widths are easy to see.  I’ve left the Pilot pen lines unlabelled so that you can guess what I used to make them.  A hint can be found in my mention of which pens I bought 🙂

The thing is, these lines are from a Pilot 01 and 03 respectively.  You can see that they are much thicker than Micron lines labelled with the same numbers.  In fact, the Pilot 03 is so much thicker than a Micron 03 that it’s thicker than a Micron 08 as well.  This is no big deal if you know it to be the case before you buy but otherwise it comes as a big surprise.

Making A Small Sketching Binder

This is actually a follow up post from my last about sketching in small notebooks.  It’s the case that I kinda-sorta glossed over how to construct the binder I talked about.  Maybe I should do it more often as I got emails from a few nice people asking me questions about it.

So here is an explanation of how to make that small binder.  Clicking on the photos will enlarge them.  While the binder I showed was made from thin mahogany sheet, I’m going to illustrated the method using a couple matboard scraps.

gaffer's tape & materialsThe most popular question I got was “what is gaffer’s tape?”  If, as Red Green says, duct tape is the handyman’s secret weapon, gaffer’s tape is a modelbuilder’s friend.  My bet is that gaffers use it too.

It’s black.  It’s a fabric tape that comes in several widths.  It’s about as sticky as duct tape and it cuts cleanly.  Here it is, with two, notepad-sized pieces of mat board ready to be taped together.

The key to a successful binder is placing the two cover pieces up against one another as in the photo.  The outside surfaces should be facing downward.  In this way, when the book is opened, the two cover edges will butt up against one another, providing a built-in limit for the hinge and a stiff, single surface, just as when you open a game board.

inner binding

Cut a strip of tape that’s longer than the height of your covers.  I actually attach the tape to the table top just above the covers.  This allows me to hold the two covers together as I pull the tape down across their interface.  Use a razor blade to cut the ends of this tape flush with the cover surface.  DO NOT wrap the tape around to the other side or the hinge won’t work.

outerbinding

Insert one of your notebooks between the covers and squeeze this sandwich together.  Place a piece of tape along the face of one cover and, maintaining pressure on your sandwich, roll the tape over the hinge point to the other cover, smoothing out the tape on the back cover.

Finished_book

Voila, you’ve got a binder. You’re on your own for rounding the outer corners.  I just used a disk sander on my wooden one but it would be easy enough to cut them.

Now all you’ve got to do is find a notebook that is happy with whatever pointy device you use.  I mentioned last time that neither the Baron Fig or Field Notes notebooks are happy with fountain pen inks, though if you use Microns, Sharpie pens (not markers) or ballpoints, you’ll have good luck, with the potential for a bit of ghosting.  With fountain pens, however, or even using Micron/Sharpies to fill in an area with a dark field of ink, you’ll experience bleed through, potentially ruining the backside of the page.  I thought I’d share some of the tests I’ve done.  Keep in mind these are 3×5 sketches.

2015-03-23sketches1

Here are two quick sketches I did of people waiting for the bus.  The one on the left wasn’t too bad.  There was a tiny amount of bleedthrough from one of the dark heads.  For the second one, however, you see that I filled in some areas using the Sharpie Pen and most of those areas showed significant bleedthrough that would prevent drawing on the backside of the page.

2015-03-23sketches2

2015-03-21skaterThe last example I’ll show you is this skater.  He was on a poster advertising a crazy event they have here called Crashed Ice, where skaters race down a curvy downhill course, complete with jumps and, well..more than a little bit of crashed ice.  You can see a bit of ghosting from the previous page but I don’t find that objectionable for this purpose.  This experiment is interesting because there was no bleed through.  All of the pen work was done using my Pilot Falcon (fine) and De Atramentis Document Black ink.  I expected some bleed through in the cross-hatched areas but I didn’t get any, probably because I didn’t let the pen stop moving.  So I went one step further.  I did some shading with a Tombow water-based brush pen.  I’ve found that water-based brush pens (the brands I’ve used) don’t penetrate the way most solvent-based brush pens do (the brands I’ve used) and I was pleasantly surprised that the Tombow worked just fine in the Field Notes book.

In the end, I’d sure like to find a 70-80# paper staple-bound notebook that would eliminate the bleedthrough problem.  I’m still on the hunt.  In any case, I hope I’ve answered the questions about creating the binder.


Sketching In Small Notebooks

It’s officially spring in the northern hemisphere.  I wonder.  In Quebec City, it snowed last night and it’s currently -17C with the wind chill dragging it down to -27C.  Is that REALLY spring?  I don’t think so.  I’m staying inside today and thought I’d begin the day with a blog post.

I’ve been on a quest ever since I took Marc Taro Holme’s online course, People in Motion.  During that course he introduced the use of a “scribbler” – a small notebook in which you are supposed to draw constantly.  The idea of a small notebook for all the time drawing was not new to me.  Yvan Breton got me doing that a couple years ago.  I’ve been using notebooks that I bought at the dollar store.

What sent me on my quest was Marc’s use of a Moleskine “Cahier” as his scribbler.  These are very thin, staple-bound notepads, much thinner and lighter than my notebooks.  Of course I had to try it.

And I didn’t like it.  There were a number of reasons.  Like my notebooks, there are problems of ghosting and bleed-through but, while it can be annoying, for the purposes of capturing scenes and people quickly, it’s a mnor problem.  They don’t take color well either.  But the real reason I didn’t like them was that they are floppy.  I need all the help I can get when I put pen to paper and a hardcover backing is important in that respect.

But I couldn’t get the idea out of my head.  I reported on Baron Fig notepads as I investigated this further and I’ve filled one of them.  As a post-review follow up, I found the covers to be a bit fragile for someone shoving these books into his coat pocket.  Paper is nicer than the Moleskine, however.

2015-03-21Sharpie_book

Lately I’ve been drawing in a Field Notes notepad.  These have the virtue of being beautiful.  They release new colors and styles all the time, but the base idea is a 3×5 book with decent writing paper… as long as you don’t use fountain pens.

2015-03-20Old Eaves

This sketch was done with a Platinum Carbon fountain pen without much bleed-through so very fine fountain pens work.


This last part is a glitch for a fountain pen guy like myself but for this purpose I don’t even mind switching to a nylon or ball-point pen.  In many ways this is preferable as I can just shove a single pen into my coat pocket along with the notepad and don’t have to dedicate a fountain pen to the process.  I’ve been using a Sharpie, refillable pen (not the markers).  But that floppy problem…what to do.

THree Field Notes notebooks and a Moleskine Cahier.  Either works well if you avoid fountain pens.

Three Field Notes notebooks and a Moleskine Cahier. Either works well if you avoid fountain pens.

It required considerable communication between my three neurons but once a plan was formulated it took only a few minutes to create it.  My binder is nothing more than two sheets of 1/16″ mahogany (any thick cardboard would suffice) cut to the size of a Field Notes notebook.  I then laid them, butted against one another, and taped them together with gaffer’s tape.

I closed the binder around a notepad and while holding it firmly together, I put gaffer’s tape on the outside of the hinge area.  Now, when it opens, it forms a stiff platform that’s 6×5.  Works like a champ.  I hold the book in place with very thin hair elastics that I picked up at the dollar store.  Rubber bands work but they generate a bump under the paper.

These books will lay flat, so drawing across the fold is feasible.  I’ve just started using this so only time will tell whether it’s viable but it seems workable to me.  If so, it’s a cheap, very lightweight way to have a sketchbook with you at all times.  If you wanted better paper, of course, you could always make your own for a binder like this one.  I may do it myself as I investigate this further.

2015-03-21fromBrulerie

I did this sketch while looking out the window of a coffee shop. Will it ever warm up?


Sketching In A Baron Fig Apprentice Notebook

One of the highlights of this otherwise miserable winter was taking Marc Taro Holme’s People in Motion class.  During the class Marc suggests that you get a small, cheap notebook and sketch in it constantly.  He recommends the Moleskine Cahier (same paper as the Moleskine notebooks but without the hard cover).

I think the idea of a small, cheap notebook that facilitates sketching everywhere and all the time is a great one.  On recommendation from my mentor and buddy, Yvan Breton, I’ve been doing this for a couple years and it’s done more for my ability to draw than anything else I do.

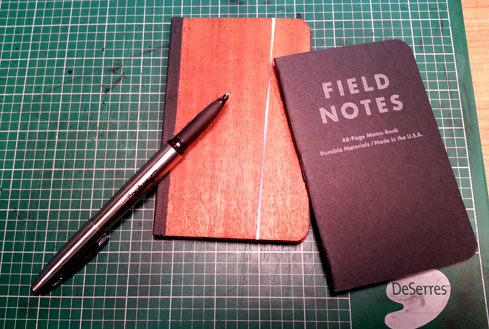
What I hadn’t tried was the Moleskine Cahier so I bought some.  They come in a 3-pack for about $12 around here.  I was very disappointed because of bleed-through and lots of ghosting when I used my fountain pens.  I complained about this here, and included a bunch of sketches to illustrate the problems.

But what I really did like about these little books was how small they were.  My typical small book has a hard cover and 96 cheap-paper pages.  These books are 5.5 x 3.5 x 0.5″ while the Cahiers are only 48 pages with a thick paper cover and are thus about 1/8″ thick.  Very portable, very light in the hand.  If only….

There are alternatives and I’ve been trying them.  Tina Koyama motivated me to try Baron Fig‘s notebooks, and I think I might be falling in love with their little Apprentice notebooks.

While the typical small notebook is 3.5″ x 5.5″, the Baron Fig is 3.5″ x 5″.  When I received them this threw me off a bit as I was more used to the other size but now that I’ve used it a bit I find that I actually prefer it.  It fits my hand better and certainly fits in a pocket more easily.  Size does matter.

Baron Fig

The books are 48-pages of white (an improvement over Moleskine) paper and cardstock cover.  They are stitch-bound rather than stapled like most of their competition.  It’s a nice touch and the stitching is perfect.

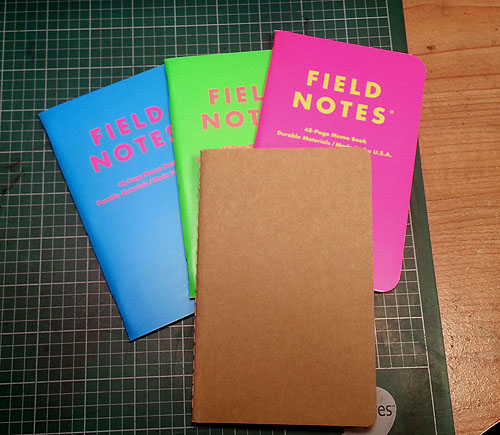
While they can be had with lines, grid or blank paper, I bought a pack of their standard gray notebooks (3 per pack) and a pack of their “limited edition” Time Travel series.  They cost only $10 per pack so, $3.33 per notebook.  Not bad even if you do use a lot of them.

All this is great but the proof is in how they handle ink.  For me that means fountain pen ink.  Typically I use fine nib pens in my small notebooks because of the small format and a side benefit is that it places lower demands on the paper when it comes to bleed-through and ghosting.

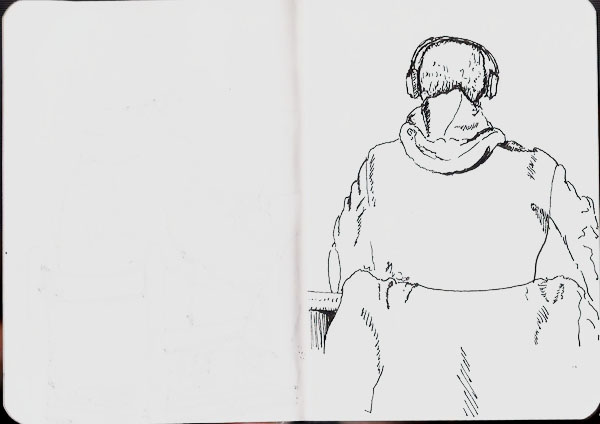
But what happens if you do use a lot of ink on Baron Fig paper?  The results are better than I thought.  I decided to try Tina Koyama’s favorite pen, the Sailor Fude pen.  This pen can lay down a lot of ink or a little ink depending on the nib angle.  Here’s the result of this experiment.

2015-02-18library1

Baron Fig Apprentice, Sailor Fude pen, De Atramentis Document Black

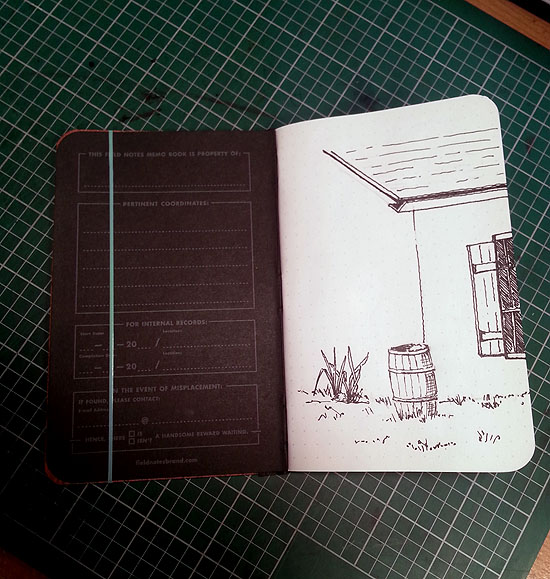
Of course the “proof in the puddin” is to look at the back of this sketch.  Here it is (on the left):

2015-02-18library2

As you can see, there is some ghosting but not much in the way of bleed-through.  We’re not talking about doing drawings that you’re going to frame so, to me, this is acceptable.  The sketch on the right was done with a Namiki Falcon SEF.  This is my typical nib size for these and the ghosting on the back of this sketch is negligible.

But what if you wanted to use the Sailor pen and also wanted to draw on that ghosted page?  Could you do it?  Sure, the ghosting wouldn’t distract from your sketching.  It might, however, not look as nice as you’d like when you scanned it to send it to your favorite social media group.  But, with the magic of Photoshop (or some other graphics program), you can easily remove this ghosting so that it looks like this:

2015-02-18library2.1

These results are the same as I’ve gotten from the paper in my cheap hardcover books so I’m thrilled and the paper in the Baron Fig as it looks better and feels better.

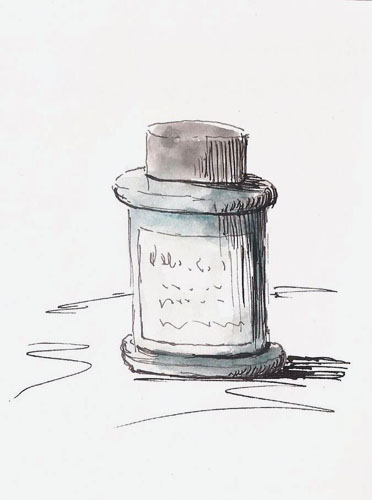
My cheap book sketches rarely see any color, simply because I’m generating lots of sketches as I wander through my day and so there’s no time for color.  But, for this post I decided to add a bit of color to see how that worked.  I kept the washes light and didn’t expect to move them around much.  I was surprised at how well it worked.

2015-02-18library3

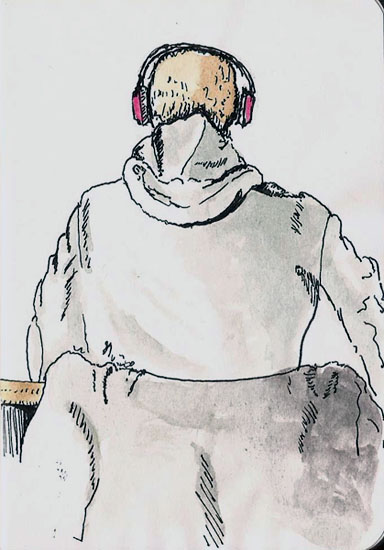
Baron Fig Apprentice, Namiki Falcon, De Atramentis Document Black

This is definitely not watercolor paper but I was happy with the results.  This does increase the ghosting a little bit but surprisingly little, as long as you wait for the paper to dry.  This definitely opens the door for me to use my gray and brown waterbrushes to shade drawings on the fly.  If you’re looking for a small, very portable, sketchbook solution, the Baron Fig Apprentice might be what you need.
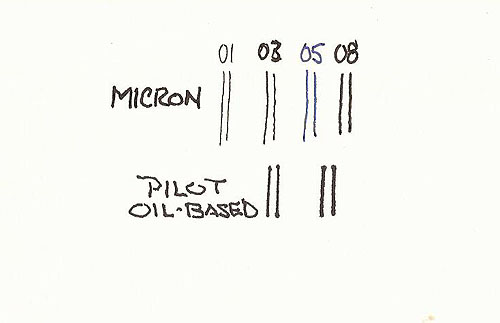
 

De Atramentis Document Ink: Creating A Grey

The new De Atramentis Document inks (not to be confused with other De Atramentis inks) are a dream come true for those of us who sketch with fountain pens and want waterproof inks.  Before they came along, color choices could be described pretty much like Henry Ford described color selection for the Model T Ford – “any color as long as it’s black.”

The current elephant in the room question is whether we’re going to have a ready supply of these inks over time.  De Atramentis is a one-man operation and Goulet Pens, to my knowledge, is the only source for them in North America. Their last shipment came in and went out before some people had a chance to even see them show up.  Brian has said their current order is very large.  I hope so.

I was one of the lucky ones.  I’ve had De Atramentis Document Black and Brown for a while now and was able to fill in the other colors during the few hours they were available at Goulet Pens.

The potential to create any color I want now exists, except for one thing.  De Atramentis sells a solvent for their inks and proper dilution should be done with that solvent.  These inks are pigmented inks and every ink have a particular chemistry to give them the flow and paper interaction properties of a particular brand of ink.   The proper solvent should be used to provide the proper lubricant, stabilizer, and maybe anti-fungal agent in their proper proportions.  The big deal here is the lubricant as this generates proper flow through the pen.  Too much lubrication and you can get feathering, nib creap, and slow-to-dry inks.  Too little and you can get a dry-writing ink, though it may actually dry more quickly.

So before I continue, there’s my caveat.  If you fear doing anything that might be referred to as an “experiment”, read no further.  This is an experiment.  I’ve mixed up a grey ink using the brown and blue ink in this line.  It creates a very dark grey, not unlike Noodler’s Lexington Gray  but a bit darker.  I wanted to lighten it up, but the solvent isn’t available to me, so I used water.  Worse still, throwing caution to the wind, I used plain old tap water to thin the ink.  Here’s what I mixed:

De Atramentis Document inks, not to be confused with other De Atramentis inks:

Brown:  3 parts
Black:    2 parts
water:    3 parts

That works out to 60% water, which is a lot but I found that when thinning other inks I had to add a considerable amount of water to lighten their color.  This proved true for the De Atramentis Document inks as well, maybe even to a greater degree.

grey

grey2As you can see, I got a decent dark grey.   I may want to play a bit with the blue/brown mix or maybe try a green/red mix but this is just about what I want on a tonal scale.  Just enough to take the harsh black edge off my sketches.

The real point of the experiment, though, was to see how diluting with water would work.  I’m surprised to say that even with this extreme dilution, the ink holds up nicely.  There is no feathering, the line remains consistent and there are no flow problems with the Pilot Prera (fine nib) that I used to dispense it.  I wanted the sketch to reflect the tonal differences between the black and gray lines so I used De Atramentis Black to do all the shadow lines on the right side of the bottle.  After scanning I quickly slopped watercolor all over it and can report that the waterproof nature of the ink is retained.  All of this is being done on cheap sketchbook paper.  Just to ensure that it wasn’t the result of the paper, I did a bunch of scribbles on Stillman & Birn Alpha series paper and those were were waterproof as well.

By the way, there’s been some discussion of a Fog Gray color being added to the De Atramentis line.  Those few who have had access to it have found that it’s really more of a grey blue than a true grey.   Given that it’s easy to mix our own greys, though, it hardly matters.

For me, the experiment was a great success.  To be honest I’m still a bit surprised because in my experience, dilution of pigment-based products (wood stains I’ve used) with water are very limited and things tend to fall apart once you get past 10-15%.  Here I’ve more than doubled the volume of ink with water..and it still works.  Go figure.  I still wish I could get access to De Atramentis solvent but until that time…I’m going to go draw a few shades of grey.